
Contents
Perhaps you’re aiming for a rustic look for your home or maybe you just have eclectic tastes? If you’re passionate about the environment and about sustainable furniture, there can be nothing more eco-friendly than a tree stump table.
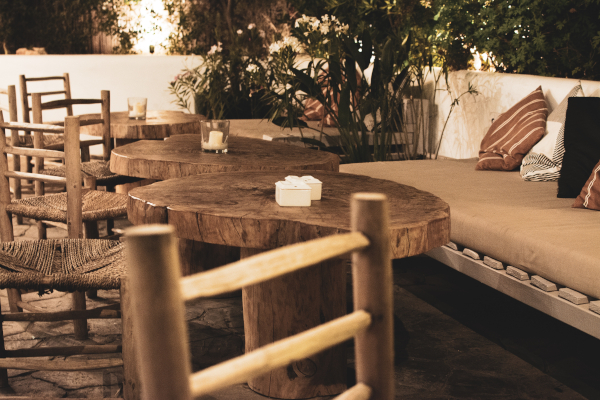
Using the ultimate reclaimed material, a tree stump table is not only a unique fashion statement for your living room, but it is also a useful addition to your home.
Ideal as a coffee table, side table, or simply for decoration, it is a great project for anyone who is interested in woodworking, and is simple enough to be carried out by anyone with just a few standard tools and in just a couple of days.
Essential Tools
The good news is that if you are making your own tree stump table, you will only really need a handful of basic tools that most keen DIY enthusiasts will have in their workshop or garage. You will need:
- An orbital sander and sanding discs (either polyurethane or shellac in 80, 120 and 250 grit)
- Chisel
- Hammer
- Stain brushes in small, medium and large sizes
If you would prefer, you can use regular sandpaper instead of an orbital sander, however the job will be completed more quickly with an orbital sander. If you wish to attach legs to your table, you will also need a drill and appropriately sized drill bits for attaching the legs. Depending on the stump that you choose, you may also need to have a handsaw to hand too.
Other Essential Items
As well as the basic tools that you will require to make your tree stump table, you will also need some essential safety equipment. This includes:
- A dust mask
- Safety goggles
- Safety gloves
Of course, you will also need a suitable tree stump as well as some stain (satin leaves an attractive sheen). If you are attaching legs to your table, you will also need to buy some of those too together with suitable attachments.
Finding A Tree Stump

You may already have found a tree stump and it may have inspired you to try out this DIY project, however if you don’t already have one to hand, there are several ways of getting hold of one. A clearing company or tree trimming company may be a good place to start if you are hoping to buy a suitable tree stump.
On the other hand, you may want to collect your own tree stump. If this is the case, you will need to draw a pair of parallel lines in the size that you want, and then use a saw to cut the stump. A sharp blade is essential to getting a straight line, and the straighter you can make the line, it will take less work later to achieve the effect your desire.
Drying Out Your Stump
If you have cut your own tree stump you can’t immediately rush into making your table. Unfortunately, you will need to wait until it has thoroughly dried out. This could take a month or as long as 6 months, but once the process has been completed, the stump will be a lot lighter and its bark will be considerably looser, making the next step of the process much simpler.
If you have cut your own stump, you should leave it drying outside for a couple of months and then bring it indoors to dry out for one further month at a minimum. Even if you have acquired your stump from elsewhere, it makes sense to allow it to fully dry out for a couple of weeks inside your home before starting work on it.
Always raise up the stump from the floor as this will allow much better air flow and it will also ensure that no mold grows on its base, especially when leaving it outdoors to dry. If you allow the stump to dry out more slowly, there is less chance of the stump cracking, and while cracks aren’t the end of the world, you will achieve a more professional look if you have a flawless stump.
Removing The Bark
Once your tree stump has fully dried out, you should find the bark much easier to remove. This is good, since this is the next stage of the process. Take your tree stump outdoors, since the process is quite messy and you won’t want to clear up lots of shed bark from your living room carpet. When removing the bark, you should follow these steps:
- First put down a large piece of cardboard or sheet under your work surface. This will make tidying up afterwards a lot simpler and quicker.
- If the top surface of your stump is very uneven, you will need to even it out, either using a handsaw if the stump is particularly at an angle, or by using a 60 grit sandpaper sponge if it just requires a little smoothing.
- Use a chisel to gently remove the bark from the stump. Take care not to dig the chisel into the wood of the stump as this will damage it. If you leave the bark on, your stump table may look rustically attractive, but it will not be able to seal fully and then you will find that the bark will start to peel away in any case.
- If there are any stubborn spots of bark which are difficult to remove, you can use a hammer as well as your chisel for a bit of extra force.
- If there were any branches attached to your tree stump, these too will need removing. You can use a saw to remove these stumps so that they lie flush to the sides of the stump.
- Depending on the type of wood that your tree stump is made from, the bark could be easier or more difficult to remove. Some types of tree have bark that peels easily away, and can be removed by hand. Other kinds of tree require a lot of effort.
- Once all of the bark has been removed, you can clean up the workspace, picking up the cardboard or sheet and dumping all of the dust, removed bark and wood pieces into the garbage.
Strip And Sand Your Stump
Once all of the bark is removed, it is time to finish stripping and then to sand down the stump.
- The first step is to use some 60 grit sandpaper to strip off any large remnants of bark that still remain on the stump and then to clean up the stump.
- Next, you need to remove any sharp edges on the bottom and top of the tree stump by using a piece of 80 grit sandpaper. You should also bevel them for the best possible finish. You can also use the same sandpaper to further clean the sides of the stump and to make it even smoother.
- Ensure that you have beveled all of the edges, including in the knots and splits. You can use a spirit level on the top of the stump to check for any raised areas that need sanding down to make them level.
- In order to achieve a completely smooth finish, you should then progress to using some 120 grit sandpaper and finally some 220 grit sandpaper to achieve perfection. When you run your hands over the wood, it should feel completely smooth with no lumps, bumps, or sharp sections.
- You will find it quicker and easier to use an orbital sander for this task if you have one, however, remember that you should always move the sander in a consistent forward and backwards movement to ensure that you don’t accidentally create any low areas.
- Once you have finished this step, your stump should look a lighter color, however, this step does produce a lot of dust, so you may want to work on a piece of cardboard or on a sheet to make cleaning up quicker and easier.
Cleaning The Stump

Now all of the bark and all of the rough hairs and patches have gone, it’s time to finish cleaning the stump ready for the next stage.
You should use a shop vac to run over the surface of the stump and its crevices to ensure th